Difference between revisions of "BiblePay Email"
| Line 69: | Line 69: | ||
<html> | <html> | ||
<img src='Https://seven.biblepay.org/img/Thunderbird/Thunder3.png' /> | <img src='Https://seven.biblepay.org/img/Thunderbird/Thunder3.png' /> | ||
| + | </html> | ||
| + | |||
| + | |||
| + | |||
| + | |||
| + | ''' How to Setup BiblePay E-Mail with Outlook ''' | ||
| + | |||
| + | |||
| + | |||
| + | <html> | ||
| + | <img src='Https://seven.biblepay.org/img/Thunderbird/Outlook1.png' /> | ||
</html> | </html> | ||
Revision as of 16:17, 11 June 2023
How to Create a BiblePay E-Mail Account
From Unchained desktop, navigate to E-Mail | E-Mail Maintenance.
Specify the E-Mail username you would like to use, without the @biblepay.org suffix.
Click Submit.
Note that you must have at least 1000 BBP in your unchained wallet.
Once provisioned, you will immediately see the e-mail client settings that are used to set up the home e-mail client. Now you can set up your home e-mail client (IE Outlook, Mozilla Thunderbird) or your iPhone etc (See below).
How to Set Up BiblePay E-Mail with Thunderbird
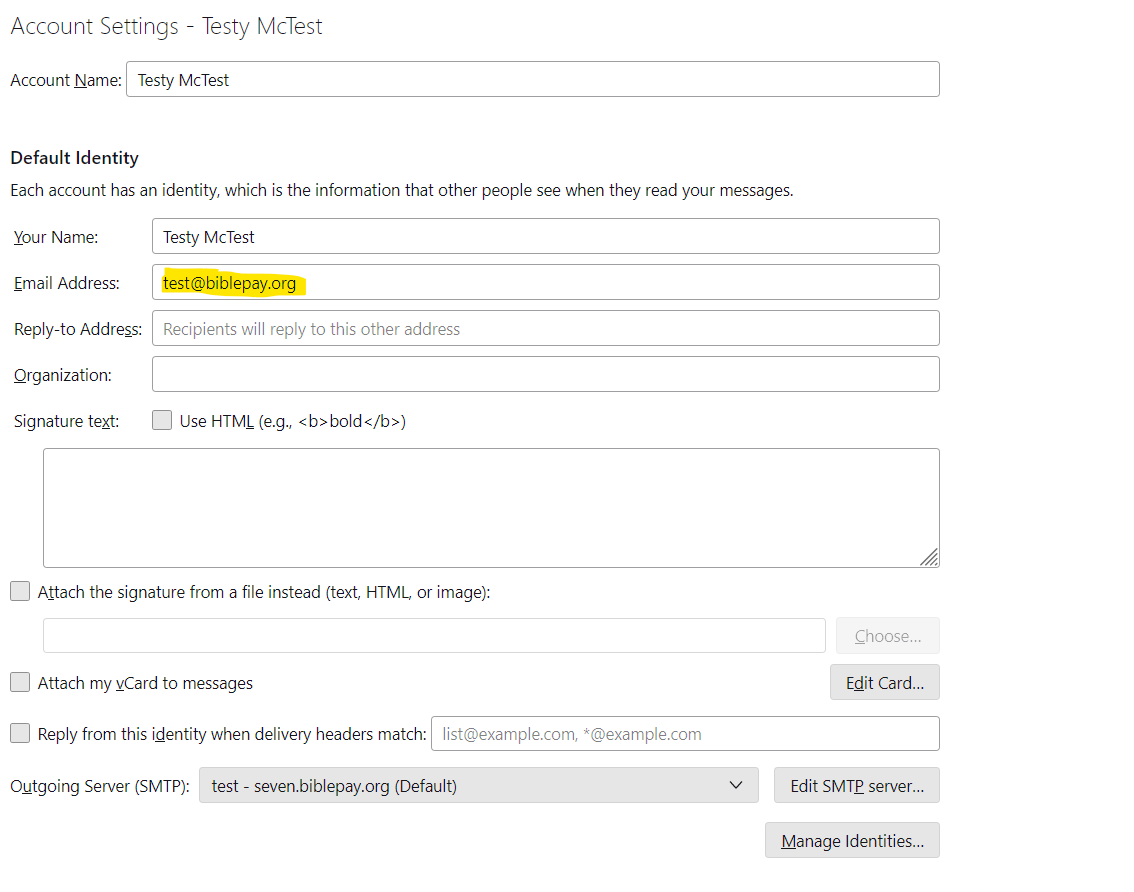
From Thunderbird, click on Tools | Account Settings.
Populate the Account Name and the "Your Name" to be your preferred human readable account names.
Populate E-Mail address to be your new UserName + @biblepay.org.
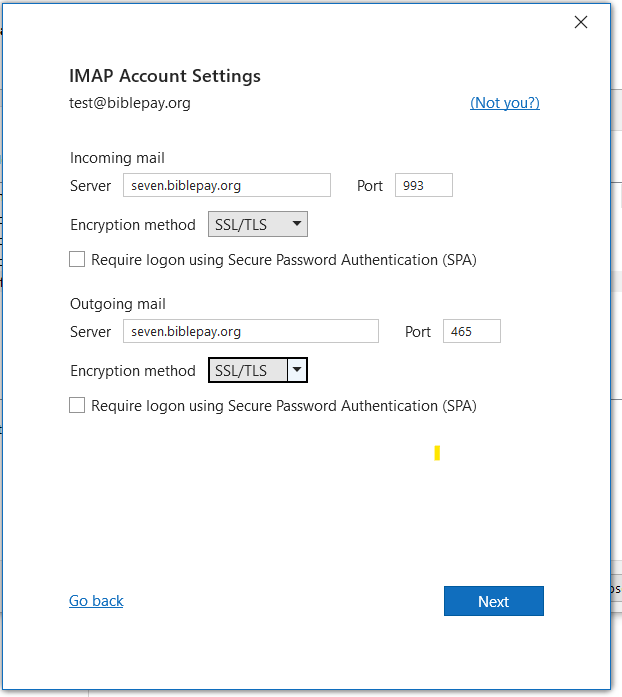
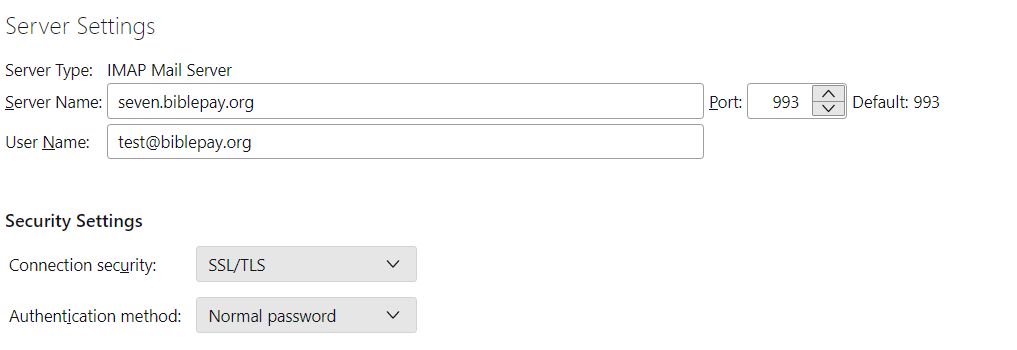
Click Server Settings - Here is where you populate the IMAP settings:
Populate Server Type = IMAP
Server Name = seven.biblepay.org
User Name = Your BBP username @biblepay.org
Port = 993
Security = SSL/TLS
Auth Method = Normal
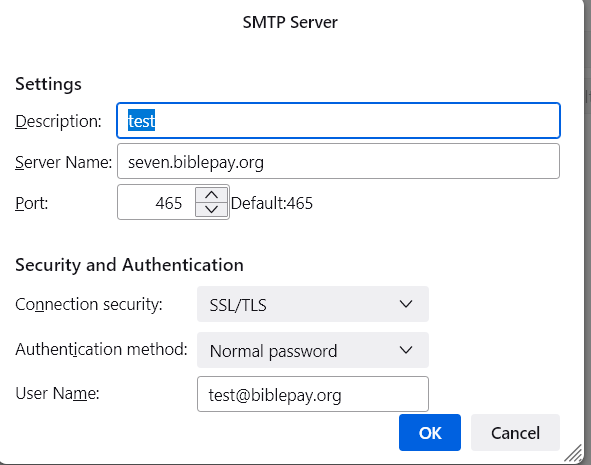
Click Outgoing Server - this is where you set the SMTP settings:
Click Add
Server Name = seven.biblepay.org
User Name = Your BBP username @biblepay.org
Port = 465
Security = SSL/TLS
Auth Method = Normal
How to Setup BiblePay E-Mail with Outlook